23 April 2013

Angels and Other Things

Hello Readers!
You all thought you wouldn't see those angels from the last post for eons! 
I actually finished them! 

They're laying on the kitchen table with magnets attached! Unfortunately this isn't a picture of the finished project. I also put aluminum stars on their tummy where their hands should be.
I wasn't sure my little star punch would actually punch through the aluminum sheet I cut from a can that tea came in, but it worked out right nicely! My star punch got sharpened and I got the stars I wanted!
I forgot to take a picture of the kitchen table before posting. There are owls there that are finished also.

As of today there are a grand total of 268 origami cranes accounted for.

If memory serves me correctly, there are 53 cranes in this pile. I forgot to write that figure down. I folded all these guys up and put them in plastic bags to send off to California. 
I'm still folding cranes. Cut a stack of magazine pages yesterday so the paper is handy while I'm sitting in front of this keyboard watching mindless hours of some documentary or another. 

I've not counted how many are in this bowl. I've added to it since I took this picture. I'm guessing there's probably around 30 of them there.
More cranes are in the future!

I gave away almost all of my origami butterflies so I made some more.
These aren't finished yet. They still need antennae and a magnet.
I painted a few of them with fingernail polish to see what I could make of that. The goldish colored one in the pile to the right of the bowl is brown kraft paper painted with sparkly orange fingernail polish. It looks like it's made of gilded copper in real life. Very pretty! The white ones are painted with white fingernail polish. I'm going to add some color to them before it's all said and done.
You'll see these again.

This is what the coiled basket looked like yesterday before I got out the needle and crochet cotton.

Ta-da! Finished!
It ended up being about 3 inches tall by 7 inches across.
It isn't as stiff as I would like it to be but it will do.
I think you will see more of this type basket in the future also.

Acrylics on cardstock.
Postcard
I was just playing around with paint.

Frog number one.
Three more to go.
I think this will end up being a painting. ATC size.

A Bag of Money
ATC
markers on cardstock
Don't we all wish for a bag of money?

Unfinished drawing.
Mushroom Monster
I drew it. It stopped talking to me. Who knows what will happen. I just know it is not done! ATC size.

My Altered Envelope partner for April lives in Brazil. (I live in Kansas, USA.)

Front
I painted the white background with blue watercolor to make it more like the other side. The rest of it is done in black marker and fingernail polish.

Back side of altered envelope.
Nail polish and black sharpie.

These five little fishes were sewn and beaded sometime back in November of 2012, I think.  They've been hanging out in a bowl for months waiting to see the world. I gave them each a pair of googly eyes and a length of thread through the dorsal fin for them to hang. They range in length from 3 to 5 inches. They were fun to make. My first time beading like this. Not sure just what the fishes will be useful for but they are fun.

While the weather misbehaves I find something creative to do.
And I can tell you the weather has been down right fickle for the entire month of April!

This is hail. Hail that fell and covered the porch. The day before this happened, we got rained on. Then we got hailed on. Then we got snowed on. 
I woke up yesterday to snow covering the ground. It was gone by dark. 
I woke up today and it had snowed again!

Hello, Mother Nature! 
IT IS APRIL, FOR CRYING OUT LOUD!
Time for spring, old girl!
Time for spring!

Lola agrees!

Thanks for stopping by to see what I've been up to. 
Staying out of trouble-yes, that I have been doing!
Be good to one another!
It matters!
Peace
831

14 April 2013

Angels Are Pending

Hello Readers!

As I opened the window to make this post I realized those half finished angels on the kitchen table didn't get their picture taken for this post. So...Angels are pending! 
I was here last on the 9th of April. It snowed later that day and into the next. We had rain, sleet, snow and hail, in that order, with thunder and lighting to accompany the symphony for a few hours in the afternoon of the 10th. My front porch had a two inch layer of ice, snow and little pea sized hail balls. The bulk of it hail balls. Took almost 48 hours before all traces of the symphony were erased with sunshine and decent weather! 
I'm sorry to say I have no pictures of the weather and the havoc it wrecked. 

I took a roadtrip with Ma to Hays on Thursday. The furkids were grateful. They were completely out of food, all of them. The cats ate every single crumb in the bowl! I really didn't feel like going shopping but it had to be done so I did it. 

Ma and I were on our way to the thrift store in Hays when we both spotted a pile of junk down an alley. We whipped around to the pile and found some useful things. There was much more there than we had room to take with us! Ma got a nice big decorative urn for her yard and two metal patio chairs. 
We had to leave behind the good junk cause we still hadn't gone grocery shopping.

We sold the chairs at the thrift store. Hadn't planned on that happening but it did. I had bought a bunch of books, (no surprise there but hey, they were half price!) the lady behind the counter carried the box of books out for us and she saw the chairs in the back of Ma's truck and asked us about them. We told her we'd just picked them up in an alley on a trash pile. She offered us $10 for them. We were then a good 50 pounds lighter with our freight! And Ma was $10 up on gasoline!
It was a good thing we got rid of the chairs because we filled the back end of the truck with groceries. 

I bought a new cabinet to sit beside my desk here. I didn't take a picture of it either....I'm slipping, apparently. It's a four drawer plastic chest on wheels. It does not hold near as much as I wish it would. I need another drawer for my paints, oil pastels, inks and the like. I think next month I will buy it a mate.
I got side tracked with cleaning off the cd case that sits on the right side of the desk here before I ever got around to putting the new cabinet together and doing away with the wooden TV tray that sat on the left side of the desk. 

I was dreaming of paper mache projects on Wednesday and thinking about that new cabinet I'd bought the day before and my muse was hollering WE HAVE A BUNCH OF BOXES! I couldn't argue that point! 
Two birds killed with one stone! I got my paper mache fix....well, sorta... I could take this little cabinet a LOT farther with some paper mache added on! And I got the cd case cleaned off and organized which lead to even more organizing. And there's still organizing to do. Sigh.  Progress was made though! 
I had 5 boxes all the same size. This shelf here ended up being 22 inches long x 11 inches tall x 4 inches deep. I cut off all the flaps and used them as dividers/shelves. It's simply taped together with duct tape. The long shelf at top left is two thicknesses of cardboard taped together before being taped to the sides. That shelf won't hold much weight. The heaviest thing there 
is the little white porcelean bowl on the right side.
What was in this cabinet's place before was a big jumbled mess! 

I got all this paper organized that was running amuck in the chaos of my creative space and decided, after seeing a picture of a kusudama ball that was 8 inches in diameter, that I needed one of my own that size.

6 or 7 hours later... I had a sleep in the middle of making this one! I ended up with a ball not quite 8 inches in diameter, but much larger than any other kusudama ball I've made. And I've made about 24 of them. It looks pretty cool hanging from the ceiling in my deskroom. It's just magazine paper folded to make the units and then all 60 units are glued together to form this!  The other's I've made are about 3 inches in diameter. They take a lot longer to make than this bigger one.


I was actually playing around with this woven paper ball tutorial I'd skipped across while surfing the www when I said let's make a kusudama instead. I later came back to the woven paper ball.

Which as you can clearly see has not gone well at all! 
The premise of this woven paper ball is that you braid 4 flat pieces of paper into a 4 strand braid. I got that skill down pat using pipe cleaners! Yep. whipped out two 4 plaited braids with no trouble at all!
I cut the paper 1/2 inch wide and 12-13 inches, I don't know I didn't measure that. I  taped them together at the end and cut the end to a point. It just didn't work. I spent HOURS trying to braid this paper into a ball! It's kind of a ball but I couldn't figure out what the hell to do with all those loose ends. You're supposed to weave them into the ball but it eludes me just how one might accomplish that. So, no successful woven paper ball out of me this post. I will conquer the woven paper ball. 

I sat on my butt all day today folding origami cranes and watching episodes of Pure History. I can't remember what any of the four episodes I watched were about. At this moment, I haven't a clue. I know I folded 23 cranes in four hours time though. 


And that is the bulk of my creative endeavors in a 5 day time span.
It means I'm still alive and kicking! 
:) Yeah me! I tell you some days I feel as though the old body is just going to say 'screw it, I'm out of here'. The past week has been one filled with sleep and this old body of mine in rebel mode! That meaning I hurt like a Big Dog from the top of my head to the tips of my toes. Not generally all at the same time, just parts of me. No rhyme. No reason. Fibro sucks!
I am quite thankful the headaches have ceased. Not had a bad one in months! Keeping my fingers crossed! 

Thanks for stopping by and reading through to the end!
Be good to one another!
It truly does matter!
Peace
831

09 April 2013

A Little Paper Boat and More

Hello Readers!

It's a blustery morning! Gonna rain later today I do believe!

I stepped out on the front porch and was met by a blast of frigid air from the north. The weather gurus predicted rain overnight but I don't think any of that severe weather they were watching came anywhere near me! If it did, I slept right through it! Didn't look like it had rained, but it sure looks like it might!

That's the wheatfield north of my house. It's greening up nicely!
I need to make a trek out along that fence line to my mother's property line and take a good look at my little trees. We planted 147 of the little guys, I think it was three summer's ago. I say "We", but in reality...I had absolutely nothing to do with those trees getting planted. My two boys and their wives planted those trees for me. I haven't been out to really see what they're up to for better than a year!
The ones I can see from the porches of the house are getting taller but I've no clue if there really are still 147 of them doing that! They stretch from about midway on my property, across my sister's property to mother's property line. All of them planted roughly 4 feet apart.
They were tiny seedlings when the kids planted them. You can see one of them smack dab in the center of the lower half of the picture above. 
I will not be going to look at them today however.

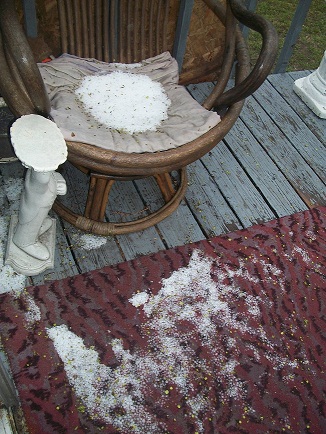
Yep, a gray day just waking up. I took this picture and the one above about 7:30 this morning. If you click on it, it will get bigger. I wonder if the little junco has decided to settle in or has he left the premises for good? I have not seen him in a few days. He was flitting around for better than two weeks, acting as though he just adored the eaves on the burnt house. I'm in hopes he's found a suitable site to build his nest and sticks around for awhile. The female should be showing up soon.
Last summer a little house wren built a nest in that cow skull on the right hand edge of the picture. It hangs on a wooden post that doesn't really have any function now. It used to be one of the stakes for the hammock. They put the propane tank there after the house burnt and that post lost its usefulness until I hung that cow skull there. The wrens did not use that nest but I watched the male for three days build it. In and out of that skull he went...numerous times a day. 

Some fur kids wanting to go outside. It's now 8 am and only one of those kids is still outside. That would be Tippy whose still out. She's a brat of a cat, that one is! That's Murray looking all zombie this morning in background. I was out on the porch when I took this through the screen door. 

Yesterday I was putting my jacket on to head off to town to buy the furkids some food. Every time Fred dog sees me getting ready to go outside he starts wagging from one end to another. With each thing I pick up he winds up even more. I put my jacket on..he started woofing. I put my glasses on...he woofed even more. I picked up my cane and headed to the front door and my ears were hurting from the barking 

coming out of this dog.


He barked at the bottom of the steps. Yelling at me to be quick about it. He wants to go for a ride! He shuts up the second he gets in the van and he doesn't have another word to say till we get back home and he repeats the procedure in reverse as I get to the house. He is a very silly old dog!

Ten minutes after 8 and Tippy has decided she's had enough of the cold wind. She was scratching at the door and meowing as loud as her little lungs would let her. I suspect before long she will join Lola (who refused to go out) and her sister Murray on my bed in a cat nap.

As usual I've been busy in the creative department. My creative goal for today is to clean off this desk and finish up some projects that have become buried in the debris covering this desk! 

I didn't take a picture but the coiled basket has some progress made on it. I sewed another couple rounds the other night watching  the latest episode of Project Runway on hulu. I have no idea why I like that show so much. I'm not a fashionista in the least! I'm more of a fashionista's worst nightmare when it comes to fashion! I wear what is comfortable, not what is in style. Yet, I truly enjoy seeing the crazy outfits those designers come up with! 

The faces for the cone dolls I showed you last post are sitting exactly where they were when I took that picture! Still having a bit of a problem actually cooking them. These are still on the back burner.
I have however completed two more cone dolls. And I still have my doubts about them....they are very weird!

The pink cone doll has the face made from toilet tissue and varnish painted with pink fingernail polish. His/her??? eyes are two green beads. I put holes in the head before it had dried to be able to give it some hair. Hair is crewel embroidery yarn. I made some danglies from beads and copper wire and sewed them willy nilly here and there. The square green thing is a ceramic tile glued to the body. It has some wooden beads on silk cords sewn around the bottom of the pink part also. This one is about a foot tall. This one looks scary to me despite the cheerful pink below that terrifying face!


This one is made with the red face that was made from that same red fiber wrapped around its body and white glue to hold it all together. I painted her mouth with fingernail polish. Her eyes are two plastic beads with a dot of black fingernail polish. (Maybe the other one needs some pupils?) Her hair is glued beneath the face and is crewel embroidery yarn. I sewed various glass and plastic beads all over her body. She's about 8 inches tall.

I have four more cone doll bodies ready to finish once I bake those polymer clay faces. Stay tuned.

Those of you who read this blog regularly know I have an obsession with paper and weaving. And when you put the two together I am not happier!

These were intended to become a basket. That did not work out. What I got instead are embellishments for something or another. I think the smaller of these will end up in the cereal box book. The other three larger ones? Perhaps they'll end up on a canvas? I really don't know. I just know they will not become a basket anytime soon cause the strips used to make them are not the right size to do that kind of weave to end up with a basket. I also know that I put too much time into them to just chuck them in the circular file! 


Weaving wasn't going so well on the 7th of April. This thing was supposed to have been a St. Brigid's Cross. That is not what it turned out to be....not exactly. I considered this a total failure on the goal set forth. Then I reconsidered and decided it was a total success in the embellishment department! It's made from chipboard from the package a doll came in. It's a nice green cardboard weaving. It's big enough one could use it for a disposable coaster. I'll be trying to make another St. Brigid's Cross some other day. Next time I'll use another material and pay better attention to the instructions. Like I said, it is a total failure at being a St. Brigid's Cross. 

A Little Paper Boat
that actually floats.  It won't last long in the water though. It's made from a 4 inch square of magazine paper. It's a cute little canoe though and kids could have a fabulous time at the beach with some of these!
You can make your own. I'm going to make one out of aluminum foil. 

There was much talk about carving your own stamps awhile back. I found some giant erasers to do just that with. Need to dig out my exacto knives and see what happens! I only bought one, but I know where the others are kept. If this one turns out, I'll do more.

I'm telling you! Weaving did not go well! This is a failed attempt also. It's sparkly and little though. We can say that about it. I cut out some circles to try to accomplish these little ornaments with pretty designs made with embroidery thread. If you do it right, you can accomplish that. I just couldn't wrap my brain around keeping the numbers straight to get the strings to go where they should have! I still have seven of these chipboard disks to work with. We'll see what happens. I forgot to save this tutorial to my bookmarks and I don't remember what it was called. Will have to do a history search and find it again.


I was waiting for the post office to reopen after lunch yesterday and painted some eggshells.

I was thinking the wooden nickles in the picture below might look nice with some mini mosaics on them. Again, we'll see what happens.
I keep egg shells occasionally. All depends on whether I feel like cleaning them RIGHT AFTER I use the eggs. If you don't clean them rather quickly it is a bear to get that membrane out of the eggs. If you don't take that membrane out of those eggs when  you go to make mosaics, the eggs will not behave properly.
I dropped the green one on the floor and it broke into three pieces. They are fragile. I keep my egg shells in an old coffee can till I need them. Then they are painted or whatever. 

I thought I had many more than 13 wooden nickles. I cleaned out my bag a few months ago and found these in the bottom of it. I got all these wooden nickles at the State Fair back in September! They have advertising on both sides of them. I painted one side with some white wall paint (works almost like gesso....two coats instead of one). I was thinking magnets. I like magnets. I painted one of them purple with the kid's watercolors I used to paint the egg shells. This is a work in progress for sure. 
For the length of this post, you'd have thought there would be more finished things to show for my time. Gotta lot on the table and not much added to the treasure pile! I will plod on! I am a Taurus afterall and we Tauruses plod well. Slow and steady. 

I do suspect beings it is going to rain today, I will not be making that trip to Hays as planned yesterday. Guess I'll stay in and make art!

Thanks for stopping by!
Be good to one another!
It matters
Peace
831

05 April 2013

Art Like Always

Hello Readers!

My muse showed up this evening and demanded we make a book. 
The zentangle envelope was done last night.

The little doll armature is still looking the same. The foils laying there under the envelope will go in the cereal box book. The envelope probably will too. I cut the end off the envelope cause I needed a piece of paper to use as a template to make the holes in the owl book. So now it's not even an envelope any longer. I'm gathering fodder for the cereal box book.

The green crochet cotton tells us the brown basket is still on the muse's radar also. I've not done anything more to it but it is sitting there waiting.

I've changed my days and nights around and am spending my awake hours in the darkness of night. When I got up at around 8pm on Thursday I really wanted to paint something! I gathered up the gessoed newspaper hanging on the line in the closet and painted them with the intention of making a book.

I drew the owl on cardstock with markers, cut it out and glued it to the cover of the  book. I painted the corregated cardboard covers with wall paint and cheap acrylic craft paint.

The pages are painted on each side. This shows you the colors of the pages. Only the dark blue one is a different color on the opposite side. That one is light blue on one side, dark blue on the other side. Outside of the two covers is that light green speckled with a darker green. Inside of the covers is the plain light green.

I laid them out on the washer and dryer to dry.

Here's the book finished. I put eyelets in the covers and sewed the single 6 page signature with yellow crochet cotton thread in the coptic stitch. The book is 7 inches square.
The newspaper pages have a weird feel to them. They have a coat of gesso on each side and then a coat of cheap acrylic craft paint on each side. They're strong, but they don't feel at all like paper.
I have no idea why owls are on the muse's radar so much this year!


The little ladybug book I showed you yesterday needed an envelope to send it to its new owner. I cut a very large bubble envelope into a single sheet about 10x12 inches. I painted it with wall paint and cheap acrylic craft paint. 
The ladybugs were made using a sponge stomper (used for painting stencils). I painted the black outline with a small paintbrush and made the dots with the end of one of my tools-a spade shaped spoon. I think it's a jelly spoon but it really looks like a square nosed shovel. It's a handy little tool when working with glitter.

I made this sheet into an envelope.

I've outted the address on this envelope. I wrote the address with a white paint pen.
The motto here is to use what you have it. This ladybug envie is much more interesting than a boring manila colored envelope! Cheaper too! I prefer to call it being frugal as opposed to being cheap....


I now have six faces made for the cone doll bodies. These guys have yet to be cooked. The last time I played with polymer clay I about burnt down the kitchen! I killed the toaster oven! Gonna wait to cook these till I fire up the regular oven. I could use some cake! Intuition is telling me to keep this on the back burner till further notice. I generally listen to that little voice as it is more often right than wrong. Good news is I got a new toaster oven but I am not cooking polymer clay in it!

I cleaned off the kitchen table last Saturday. I needed the space to make rice crispy treat eggs. That endeavor was a total failure and I didn't end up with anything remotely resembling an egg! I ended up with a squarish slab of rice crispy treats with m&ms stuck in the surface. 
I did accomplish cleaning off the kitchen table though! 
That sheet of newspaper that was taped  to the table is now on the shelf in the cutting room waiting to be turned into a book cover. The one taped there now will be saved when it too becomes too gooped to take anymore paint. I didn't tape this one down though....I might before it's all said and done but I didn't see the need when I started painting the bubble wrap ladybug envelope. 
I hadn't seen the top of the kitchen table in months! 
And now I can't see it again.....
The lamp is new too. Well, not really new....it was out in the burnt house. I was in need of more light over that table! 

I wanted to show you all some of my tools.


These are sea sponges, foam from a box that contained a bracelet at one time, memory foam, foam shoulder pads from a shirt. I use these to make patterns on painted papers. Each one makes a different pattern.


The black sponge is a filter of some sort. It came from a small appliance of one kind or another. I''m really uncertain how it came into my possession. I probably found it out in the garage or brother gave it to me. I used this tool to put the darker green onto the lighter green of the owl book covers. It makes large irregular splotches. 
The red sponge on a stick is the stencil stomper I was talking about earlier. I made the ladybugs with this tool. 
There's a sea sponge in the upper left. I have many different sea sponges. This one is not very large...it came that way in the package. The larger ones I sometimes cut down to a manageable size.
The round tube is from a roll of tape. It makes nice circles when dipped into paint.
Look around your space and I'm betting you can find some unusual tools to use in your creative endeavors too!

I do not know what tomorrow will hold. I'm sure something will come to be. Thanks for stopping by to see what I've been up to.
Be good to one another!
It matters!
Peace
831


03 April 2013

More Cranes, A Little Book and Progress In Basket Making

Hello Readers!

 I've managed to add to the crane flock by 45 birds. 
I still need to make a lid for that little brown basket...

I got around to making a little book for a trade.

It is 2.5 inches by 2 inches with construction paper pages (blue and red). Around 50 pages. Not really sure about the exact number as the page block was in a bit of disarray when I put the book together and I neglected to put the same number of pages in each signature. I've never beaded the spine of a book before. I made a bit of a boo-boo on one set of beads but the book sewed up quite tightly. That's always a GOOD thing! The ladybug is done in fingernail polish on painted newspaper, cut out and glued to the watercolor paper cover. There's a layer of chipboard (part of a shirt box) under the watercolor paper. I put a black spot in the ladybug's eye after I took this picture. The seed beads are glass and the book is sewn with polyester beading thread in the pamphlet stitch. Looks like the long stitch but each of the signatures is sewn in individually in the pamphlet stitch. It's a cute little and I'm pleased with the outcome. I hope the recipient is as pleased with it.
You all know I've been a bit star obsessed here of late. I'm not sure that phase has ended right yet.

I always have a paint rag at hand when painting. These stars were made from one such 'rag'. It was a paper towel covered and caked stiff with acrylic paint from a painting session or two. I cut out the star shapes with the intention of using them as embellishments as is. They weren't very wow so I painted them with fingernail polish in various colors. A couple of them I embroideried with crochet cotton. These are slated to be a part of the cereal box book.


I've made some progress on the big brown basket. I'm showing the little brown basket and the picture from last time to show you that progress....little that it is. The picture above is from the last progress report, the one below showing the progress since the last post.
This basket will be done when it is about 5 inches high. It's only about 2 inches at the moment. It is slow going, but going and I'm pleased with the progress.

The cereal box book is on the radar. I dream about that book! The little stars above in this post were literally dreamed up while I slept! 
These magazine page stars were constructed while watching mindless hours of Project Runway on hulu.com. 

Just marker on magazine paper. I didn't use a pattern to make these stars. If you go here you'll find a tutorial on how to cut a five pointed star with one snip of your scissors. That's how these were made. This one has majhongg scores written all over it.

Purple marker instead of black. All of these stars are about 7 inches or there abouts.

I made an armature for a doll of some sort. This is as far as the vision took me. I'm sure you'll see more of this critter before too much time passes. 
I haven't done anything more with the cone dolls from the previous two posts. Not to worry though, they will show up again in this blog.


The drawing muse has fled to parts unknown. I'm hoping she returns soon. I need some practice!

I hope all of you are well. 
Thanks for stopping by to see what's up!

Be good to one another!
It matters!
Peace
831


Followers