25 January 2012

Some Pretty Yellow Flowers, a Few Magnets and a Bit More...

Happy Wednesday, People! 
Hope you all are well today!
I don't have any new pictures of Mr. Kitty. He's still sitting atop the metal cabinet in the kitchen, drying. I'm still trying to figure out what to use for eyes.
There a few ideas bouncing around the old noggin:
*sure wish I had a ping pong ball*
*big bolts...I'm pretty sure I saw some in the prepared iron bucket out in the garage the other day*
*paper clay ... my least favorite of the ideas*
or, maybe
*plastic eyeballs...not sure they are the correct size*
So, in theory, things have been getting prepared while the kitty gets all the getting done. 
He must be perfectly dry before we proceed with more paper clay. I sure don't want the little devil getting mildew after all the work put in thus far!
Hopefully, next post you'll see some progress on Mr. Kitty.

Fear not, though! I have been busy with other things.

I showed you all some magnets in the last post. Well, I'm still working on magnets only these do not have a magnet on them, nor will they get a magnet till they have traveled to their new homes.
I read the hazardous materials part of the postal code. Magnets are considered hazardous materials if they exceed a certain amount 'pull'. I don't think anyone is going to attach a magnet strong enough to grab anything from 15 ft away to their magnets for this swap. That is how I read the code. You'd have to have a magnet strong enough to grab something 15 ft. away. If you have a magnet that is that strong holding your doodads to your fridge...you are on overkill, my friend! 
But, anyway, the magnet tops go magnetless through the mail cause that's how the swap host wants it and that's how it will be done.
I have three magnet tops in the works for that swap. I'm thinking to do 5, might be 6...I'll have to check the swap....I'm not done with magnets yet. 
I'm not sure if all of these will even make the cut for the swap. 
Red Button Key Magnet
It's a tractor key with an attached fob spray painted black. I put a few little junk pieces on it; a red button in a metal jacket, there's a blue stone, a little metal rod, some other things I can't identify from the picture and a quartz donut bead wire wrapped with brass wire. I''m thinking it needs a little something more.

Blue Flower Threader Magnet
I'm pretty sure this one will go in the swap. I'm very pleased with it! It has a lot of things on it. The base is a disk cut from a microwaved CD. I punched a hole in it and hung a little wire wrapped glass bead on a handmade jump ring. The glass bead came from a broken bracelet. (I loved that bracelet!) There are some tiny screws, a couple of ceramic beads, a string of sequins, a handmade foil rose (candy wrapper), a silver metal disk from a magnetic clip, star and leaf shaped plastic gems, little metal rod from a magnet clip, plastic silver oval, glass tube bead, piece of broken CD not microwaved, blue flower fabric emblem,  and a broken needle threader. It's a bit over 2 inches across.

I remedied the broken needle threader. That's not the only broken needle threader in my 'little junk' box. I made me a new needle threader that is not going to break no matter what I try to drag through the eye of a needle with it! I took a length of jewelry wire that was thin enough, when folded into a point, to go through my smallest needle. I wrapped the ends of that folded wire around a little wooden stick and secured it with 1/4 inch copper foil tape. It should last some years, I suspect. 
My hat is off to whomever invented needle threaders! They are a godsend!!

Back to magnet tops:

This one is rather silly. I'm debating his joining the swap. His eyes are two little screws stuck through holes punched in two metal disks (they're like tiny bowls with straight sides) that came out of magnet clips. His nose is a metal disk (flat) that came out of the same magnet clips, a white plastic cap from a syringe (perhaps? Not sure what that thing came from). His mouth is part of a red aluminum pull tab from a can of chili. All attched to a blue milk carton lid.

I thought I had turned this picture right ways, but apparently not.
When the kids came down just after the new year began, Terah, Brenton and I had a few hours of fun with the magnet making kit I got for Christmas from Justin and Courtney. 
Brenton did the orange flower and the eyeball just above the smiley face.
Terah did the purple heart, the bug with green background and the first three on the top row as you see them in the picture.
The rest are mine.
Here's a shot of the metal cabinet in the kitchen where all art magnets end up till they travel on.
Ma's yellow magnet with the butterfly in it is sitting on top of the cabinet cause E6000 does not like the plastic that peanut butter jar lid is made from. The magnet fell off, that's twice I've had to glue it back on. 

This is the beginnings of a red foil paper flower ball. It should be done soon. I have, I think 8, papers left to fold before gluing can commence. I believe I'll use one of those nice red cotton strings from the dog food bag for a hanger for it.

Yes, this is a Halloween Chunky Page. Yes, I know Halloween is nowhere in sight at this time of year. So, why did I make a Halloween Chunky Page today? Cause it seemed like a good idea. I like it. I made a few mistakes in the making of it. I only looked at the templates when I drew it up, didn't actually print them out and get it just right. His head is a tad large and it's not quite where it's supposed to be according to the tutorial, but I think he'll work just fine for a first try. Next time I make this kitty I'll give him a different background and probably make the kitty a different color as well.
I've yet to do the backside of this chunky page and danglies still need to be added. You'll be seeing this one again soon.

Just an experiment with paper roses. Not quite a success, but far from a failure.

The basket holds the backside of a sweater and about 8 hot glue sticks.
It stinks to high heaven in this deskroom right now! I used nail polish to edge my flower petals which gave the flowers a WOW factor. I'm gonna have to take them outside to finish the nail polish part. I only did five of them with nail polish, there are a total of thirteen of them. I like them! They will all be a different color of nail polish. Nothing garish. That purple is about as garish as the flowers will get. If one were going to wear the polish on their nails then the garish would come in with the yellow polish that edges the petals of one of those flowers!

Here are some unembellished flowers. These things are simply sweater material cut into rough squares with one edge rounded off. You hot glue them together to form a rose. They average about 3 inches across. I was quite impressed with how very easy it was to make them! I wasn't sure what the hell I was gonna do with them, but I've since figured that out!
These are Valentine's Day Presents!
I slapped a magnet on the back of them and viola! 
Instant roses for your fridge! (Or wherever!)

It's a good thing Valentine's Day is still a little ways off cause these things are going to have to air out in the burnt house for a few days at least!  That's the price you pay for sparklies sometimes though! I do like the look of the nail polish though it really isn't shiny. It kinda soaked into the cotton sweater material like a sponge takes in water. I will go for sparkly colors for the remaining sweater flowers. 
Once I locate that bag of sweaters I thought was in the closet I'll probably make some more sweater flowers. I've no clue what became of that bag of sweaters. It must be in the burnt house. 
Another reason to go out there!

You all be good to one another.
It matters!
I will return in a few days with more show and tell!
Peace
831

22 January 2012

Paper Mache Cat, a Few Magnets and Some ATCs


Hi Everyone!
The kitty is taking shape a bit more each day. I didn't work much on him yesterday. We are in the drying stages at the moment. 
I've figured out what to use for his eyes, but I don't know if what I have in mind will work or not without some experimentation. 
Next post we'll see how that experiment turns out!

I'll have to put another coat of  paperclay or gesso on him...not sure which just yet. 
I truly do make this all up as I go along.

His face needs a bit of tweaking as well. I'll have to drag out the dremel and drill some holes for whiskers. Not sure what I'll use for whiskers just yet either.
He's coming along nicely though and I'm pleased with the progress.

Ma came over the other day and we sat at the kitchen table making magnets from jar lids and junk. 

This one is mine. I'll be entering it in a swap over at AFA (link's up at the top). I have two others done that I forgot to take a picture of. You'll see them next time.
This one started out life as a cap to a gallon milk jug. It has a little of this and a little of that on it. Sequins of different shapes, plastic gems, fake pearls bauble, a puzzle piece, some copper wire jump rings, a clear plastic flower with green stripes, little feet lapel pin with the shaft removed, a heart cut from a microwaved CD,  brass doodad with a plastic yellow ball on top of it, a couple of glass tube beads and a metal shaft from a magnetic clip. the inside of the lid has another lid glued in it to adhere the magnet to. The inside cap is blue and came from a vanilla extract bottle.

These two lid magnets are Ma's


I really like the one with the spider!

I drew three ATCs yesterday as well.

On The Savannah
ATC 
markers on recycled cardstock

Firestone Flamingo
ATC
markers on recycled cardstock

Pliocene Pussy Cat
ATC
markers on recycled cardstock

I have a sweater monster in the works, three more magnets in the works and the paper mache kitty ongoing as well. Never a minute goes by that I am not at least THINKING of something that needs to be created. 

I'll be back again soon to show you more progress on the Art Front!
Be good to one another!
It matters!
Peace
831

19 January 2012

And the Cat Grows, Still

Hello Readers!

I'm still hard at work on my paper mache cat! I have decided I will give it to my sister Jeanny for her birthday. She hasn't even seen it and already she covets it! 
I told her I seriously considering painting it orange and I thought she would burst with excitement! I haven't actually told her she's getting the cat. I've only danced around the request. 

I got up this morning and bulked him out some and put a last layer of paper on him. 

My sister, Kathy, gave me a bunch of old paper napkins that she got from the remnants of a yard sale. I've trained my people well to look for unusual things for art! She said they weren't good enough to use for napkins cause she hadn't a clue just how old they were or how they'd been stored before she got them. They were plenty good enough to use in paper mache!

Kitty was a bit skinny in his midriff so I bulked out his shoulders a bit. Bulking out involves tape and paper...whatever kind of paper you want to use will work! Tape it on the piece and then paper mache over it. Easy peasy!

Except for his face! His snout is way too long for a cat's snout! 
I was taping little balls of newspaper to his his nose area for some cheeks to stick whiskers in later and my mother told me I should be putting those balls on the other end of him! LOL I told Ma he's been neutered!  One of his legs is way fatter than the other three. Ma was displeased I had cut a good 4 inches off the end of his tail by this point too. I fattened up his belly, his tail and along his backside with paper napkins and masking tape.

Then I covered him up with drug booklet paper. I like the fact the drug booklets are numerous colors. It lets me know where the next layer has been placed. Assures ALL of it is covered in each layer of paper. 

His chin is a bit off! I'll correct that when I apply the paper clay tomorrow. 
I had planned on getting the paper clay made today but that didn't happen so it's scheduled for tomorrow. We'll see. If I'm going to give Kitty to sis, which I'm sure I will, I have till the end of April to do it! I plan on having him done before the end of January though!

This thing, however, probably won't be done by the end of January. I spent a whole day punching stars and putting them on this canvas. This thing has stopped talking to me, as it were. I don't know what direction to take with it at this point. I've put it back on the easel to brew! I think I jumped the gun on putting the stars on! I really don't know what will happen with it. 

I started a new project on the kitchen table this evening. I must have this project done tomorrow afternoon so the kitchen table is clean for the putting on of the paper clay to the cat. 
I went out to the burnt house yesterday and collected up some magnetic clips. Took them all to the garage and proceeded to demolish said clips for the magnets in them. I was getting really low on magnets and I have about 2000 of those magnetic clips to steal magnets from! It's great for the ego to demolish perfectly good things. I took the little sledge hammer to them. I couldn't do more then 20some. My arm was killing me by then! That sledge only weighs 8pds. It shouldn't be so hard to pick it up! Took both hands to pick it up and aim it at a clip. I generally got the magnet out with one whack, but some of them took two whacks. 

I'm working on junk magnets. The swap I entered calls them Earth Day Magnets (Sans the Magnets). Apparently magnets are considered a hazardous material to the United States Postal Service. This is news to me but whatever. I'll add a magnet when I get my returns. No problem! (I just see a lot of issues with magnets not being able to be sent through the mail. If that's true how come magnets are sold on ebay and etsy and a lot of other online stores? Does UPS and FedEx allow magnets to be shipped through them? I have questions is all. But it's no skin off my teeth to make magnetless magnets for this swap!)
These are magnets made from junk. 
I have lots of junk to use in magnet making!
No pictures of the magnet progress, I'm afraid.
I've only got 1 done and 2 others in the works. All depends on if I work on them still this evening as to how many will get made. I was shooting for 7 of them, but that might not happen. Might end up with the three in progress now.
I'll show you results in the next post.
Until then......be good to one another!
It matters!
Peace
831

17 January 2012

Some Paper Mache in Progress


Remember this thing?

I woke up with this critter nagging at me.
I was on a paper mache kick back in September of 2011 when I started this critter. It'd been called everything from a cat to a wombat! I sat it on the kitchen table this afternoon and it yelled at me while I cooked some fried potatoes, so I sat down and fattened up its legs and  its head and cut a bit off the end of its way-to-long tail.
Then I promptly chopped its head off and 
put it back on again in a different position. Wooden skewers aren't just for BBQ! 
And hacksaws do an excellent job of hacking!
It was quite liberating to saw this critter's head off! When the idea hit me to cut its head off cause it just wasn't working with its head where it originated, I second guessed myself. Questioned if cutting its head off was such a good idea. I sucked it up, got out the hacksaw and boom! No head! And it felt good! It was a whole lot easier both mentally and physically than I thought it would be~!
I have decided this is indeed a cat.
There were doubts about what it would become.
This is one stout little cat! As you can see in the picture of its decapitated head, it is solid paper! The armature is made of magazine paper rolled into reeds, taped together in the shape of a creature with four legs. From there newspapers were taped round and round that armature to develop the shape of the critter. When I got tired of layers and layers of newspaper, I wrapped and wadded tin foil around the legs to fatten them up. 
I used paper napkins to bulk it out. Lots of masking tape is involved as well. 
I fashioned him some ears from corregated cardboard and taped them on his head. I taped them three times before they ended up where I wanted them! 

Then I sat down to a hamburger patty, some fried potatoes and a bowl of sweet corn for supper. I contemplated what to do with the cat while I ate.

After I got my belly full, I cut the cat's ears down some so they weren't quite so large and covered him in a layer of the drug brochure paper. I really wish there had been enough purple pages to make him all purple but it really doesn't matter cause that will all be covered over with paper clay day after tomorrow and you won't know it even had color! 
He'll get another layer of paper and glue tomorrow. I need to give him some toes. I was half way through that first layer of paper mache when I remembered I wanted to put some toes on him! Will use egg cartons for his toes. Cut the egg cups in half and trim them down, stuff em with newspaper and tape them to his feet before I put the next layer of paper down.  I'll mix up a batch of paper clay to finish him off the next day.
Not sure how I'll paint him but I'm thinking he'll end up being orange with some kind of decorations on him. Haven't thought ahead that far!
I really don't know what I'm doing! I make up the rules as I go along!
There's at least another 4 days work to do on this thing.

Nothing has occurred in the cutting room. I have no picture either.

Be good to one another!
It matters!
Peace!
831

Stuff Completed

Hello Everyone!

First, I must warn you the pictures in this post are terrible! There's something wrong with my camera! Sometimes it will take pictures as clear as can be and other times, we end up with what you're about to see in this post!
I apologize for the crappy photography! 
Blame the photographer. It is probably the result of my not knowing what the hell I'm doing! 
At any rate, enjoy!

We'll start off with my latest project. 
Completed in three days time.
I dragged out some paper mache and the paints.
I was sick of looking at the cut off coffee creamer jars holding all my markers so I made them a new organizer and got rid of three of those ugly jars. 
This thing started out life as a cardboard box. My diabetes testing supplies arrived in it. I cut the flaps off and used them to make two dividers in it so the markers could stand up even if there weren't enough of them in the box. I then covered it with two layers of newspaper-like paper. (I have TONS of this paper! It is in the form of booklets addressing the drug problem in this country to high school students. I got it from the chief of police of a small town in Kansas. I got three cases of those little booklets! They're wonderful for paper mache! God knows some of the information in those booklets isn't correct any longer. So I'm putting them to good use and making pretty things with them.) After the paper mache had dried for a day, I started painting it. I lost track of how many layers of paint it is. I started off with yellow wall paint for the outside and then got out the Dr. Martins Inks and some more wall paint and some acrylic paint and I slapped it on and wiped it off and put some in a spray bottle with a bit of water and sprayed away and I just went a little nuts with it! Took me a whole day to actually paint the thing what with drying times between colors. That was a tough one for me. I usually start and finish painting with very little drying time between colors. I'm not sure I like the paint job but it's full of markers and on my desk ready for service! The inside of it is a medium lavendar color wall paint. If I decide I don't like it, I can always give it another paint job!
I'm glad to have the markers back on the desk. They've been on the cabinet where the printer lives for weeks now! Been ages since I used them!
Be forewarned--marker drawings are in the future of this blog!

Yes, I know, this picture hurt my eyes as well.
I couldn't get a sharp picture of this wire wrapped rock to save my soul! That's all it is though, a copper wire wrapped rock. Nothing special about this rock at all. It looks green on my screen, but it isn't green, it's a plain ol' run of the mill gray piece of gravel. I dragged it out of the big diffenbachia pot (plant) in the livingroom a couple weeks ago. This is the rock I told you all I would show you when I found it again.
I found it buried beneath the shipwreck of projects that were scattered all over my desk. I cleaned this desk yesterday to be able to put the marker box on the desk. And lo and behold! There it was!
It's not a very big rock....the whole pendant is about an inch long. I rather like it. I was just practicing my wire wrapping skills. They need LOTS of practice!

Ignore the sugar bag in the background. I save all paper bags! 
This one hurts the eyes too. Sorry bout that!
Green hair green velvet Goddess ornament.
That sparkly stuff I made her hair out of REALLY sparkles in the picture! And so do the two rhinestones in the plastic button sewn to her tummy! That sparkly stuff came on a spool like ribbon does. Christmas stuff of some sort. For embellishing packages, like you would with ribbon. I bought it before Christmas for $1.27 for 9 feet of it. I might of used 12 inches for it, but I don't think so. She's about three inches long, stuffed with fiberfil, handsewn from velvet that was once a shirt. She has a copper wire bail sewn into her upper body so she can be hung. I've strung her up with some fishing line.

Her sister #2 didn't cooperate in the photo shoot any better than any of the other contestants in this post did!
She's hand sewn from that same velvet with fiberfil and the copper wire bail sewn in. She has a white plastic button  on her tummy and a chipboard tag sewn to the belly end of the bail. She's a bit shorter than her sister at about 2.5 inches. She has no fishing line to hang her with but that could be easily remedied
.

I've been sewing more mug rugs as well. These will probably show up in the posts on a regular basis throughout the year. I have a whole stack of them cut and ready to sew. 
black cloth from a man's shirt
light orange is from a jersey knit from a woman's sweater
yellow is a cotton sweater
stripes were an acrylic yarn sweater
dark orange was a woman's shirt

light orange is a jersey knit from a woman's sweater
dark orange is a poly blend from a woman's shirt
blue is fleece from a woman's sweat shirt

dark orange from a woman's shirt
light orange from a woman's sweater
stripes from an acrylic yarn sweater

pink background is heavy cotton t-shirt fabric from a dress
red is fleece from a woman's shirt
the sheep is flannel from pajamas
purple is fleece from pajamas
dark orange is poly blend from a woman's shirt
flower print is cotton t-shirt fabric from little girl's skirt

orange is from a woman's shirt
purple is fleece from pajamas
All are about 4 inches square, 2 layers hand sewn with crewel embroidery thread. All are made from repurposed  fabrics.

I have plans to make more monsters, pot holders and maybe a tote
bag or two as well this year. I need to make a prototype of the tote bag I have in mind. You'll all see it when it materializes.

In addition to the creating, I'm slowly working my way through the cutting room. I'll show you all a picture in the next post of what the cutting room looks like today and another picture of what it looks like on the day I make the next post. I'm hoping for progress to have been made! We shall see!

I didn't read very many books last year at all. I think only four or five. One of my goals this year is to read at least one book a month. I started The Partner by John Grisham a couple days ago. I bought it at the thrift store for 50 cents. I have almost every book John Grisham ever wrote but I didn't have this one in my collection. Good to have found it! It's a first edition as well which just puts the cherry on top of the sundae for me! I bought another John Grisham novel that day too....can't remember what that one is called right off the top of my head. I didn't have it either. I'll read it next. And then I'll start in on that stack of books I got from my sister right after Christmas when she culled her book shelves. Must be 2 dozen books in that stack. Not all of them 'reading' books but I'll plow through them nonetheless!

I'm not really participating in the 365 Project this year. I'm still trying to make at least 365 things this year and I don't see any trouble in accomplishing that goal. I simply don't have the 'want to' to post about it everyday to get my projects on the 365 Blog. 
By all means go visit them though!!! The link is in the upper right corner over there>>>>>
You'll get new eye candy every single day! 
I didn't really participate much last year but I did hit the goal of having made the equivalent of something everyday even though I don't have something written on my calendar for every day of last year. I didn't count each ornament I made individually. I counted all those as lots. I hit 365 and beyond though.
But anyway, go check out the 365 Project blog. You won't be disappointed! I promise!

I have shelved the envelope book project for the time beings. The person I was to trade this envelope book to has disappeared and it took the wind right out of my sails on this project! I still plan on finishing the envelope book, just not sure when at this point. 

Until next time:
Be good to one another!
It matters!
Peace
831

05 January 2012

Work in Progress and Some Other Baubles Completed

Happy Thursday Everyone!
It's really only Wednesday as I write out this post but it will more than likely be Thursday by the time anyone reads it!

I'm still in the swing of creativity. I don't think that is going to slow down any anytime soon. I may have to take a breather for a few days while the kids are here for a visit but I'll get right back in the swing of the things next week.

In addition to the things I'm going to show you today, I have a couple of Goddess Stuffies I'm working on and a few other things rambling around in my head that I would like to give a go. I'm also still working on mug rugs, though that endeavor has slowed down considerably. I'll probably sew some of those while the kids are here beings they are all ready to be sewn.

I made a couple of altered key ornaments. I don't know what else to call them other than ornaments. They're just hangy things to do with what one wants. They could be hung on the Christmas tree I suppose, or one could hang them from a window shade as a pull for the shade or one could hang one from their rear view window in their vehicle. I've no clue what I'll do with these two. Trade them perhaps?
They're just useless keys made into something pretty. 
I spray painted the keys black and put irrediscent glitter glue on one of them. I used a variety of doodads on them. Made jump rings from copper wire and silver colored wire, used a bit of ready-made chain and some beads and charms and what have you. The one above has a pink stone of some sort that should have been a bead but the hole didn't get cut all the way through. There's another stone on this one along with the plastic and glass beads. That big round thing is a piece of pvc pipe cut into a ring. I put a hole in it with my crop-o-dile and added a couple beads to pretty it up. The horseshoe charm was once an earring. The mate to it long lost.

This one is in shades of black, white and silver with a hint of copper thrown in. It is just glass and plastic beads, a metal disk that came out of a magnetic clip, a plastic coin, some ready-made chain a white quartz stone wire wrapped to the key.

I was sitting in front of the pc the other night playing Mahjongg, thinking I was wasting my time and I decided to drag out the polyclay to see what I could come up with.
This clown head appeared! I used a burnt out camera flash bulb as an armature for his head. You can see he isn't very big from the picture of him in my hand. He's one of the works in progress. Not sure what will become of him.

I'm thinking he needs a paint job as I totally spaced him out when he was in the oven baking. He's a bit brown! I think I might sew him an outfit and make him some hands and feet out of polyclay as well. We'll see what happens with him. Heck, he may end up in a container of 'things I don't know what to do with' and nothing will happen with him! (Why has the font changed? I didn't do anything to make it change! Damn computer has a mind of its own some days!)

There is a swap over at AFA called "A Jar of Hearts" Swap. I don't think I'll enter the swap, but I got inspiration from the theme of this swap! I made this little thing last night.
It's a little velvet heart filled with polystuffing and some beads sewn to the front side, a length of wire with a loop on either end impaled through the heart to hold the danglies and for it to have a way to hang. The danglies are just ready-made chain (an old necklace) and sparkly plastic beads to match the beads on the heart itself. Jump ring is copper wire wrapped around a Sharpie marker to make the jump ring. This thing is about 3.5 inches long. 

This is the work in progress I talk about in the title of this post. I accepted a challenge to make a 10 page envelope book with a pink theme. These are the pages thus far.
Cat still needs some eyes. He's free hand cut collage, a fabric embroidery patch on his chest (daisy), some chipboard cutouts, copper wire for his whiskers, glitter glue in gold, magazine paper, writing paper, cardstock, scrapbooking paper, foil paper and envelope. I used a bit of marker on him as well.

This is the backside of the cat envelope. It's a mandala done in red sharpie on dark pink mulberry paper.
This mandala represents affection.
 Kinda hard to see in the picture. I really don't take very good pictures! 

Fish #1 for the envelope book is a bit of this and a bit of that....the fish is made from cardstock, sparkly pink paper and little dots cut out of various pinkish colored papers. There is some gold glitter glue, silver sequins, handmade paper, ironed easter grass, pink netting, crewel embroidery yarn and a bit of marker on there. Some purple tissue paper as well. This page is a bit stiff cause I put the design on a piece of chipboard the same size as the envelope.

Backside of Fish #1. Just markers on the envelope itself. Free hand drawn mandala.
I decided to go with mandalas for the backsides of the envelopes cause to me, mandalas can be made for anything! The fish mandalas represent abundance. You can interpret that anyway you like though.

Fish #2 is made in the same fashion as fish number one minus all the stuff in the background and the need for a chipboard layer. Fishes both still need eyes attached. This one has a copper wire fishhook in its mouth. The pink background is just regular writing paper with swirls and doodads drawn on the one side of the fish with a white paint pen. 

You all have already seen this mandala. It's done in ball point pen on thick chipboard, cut out and glued to the backside of Fish #2 envelope book page. 

Marie Antionette Envelope Book Page.
That's Betty White's face on Marie! Makes me bust out laughing every time I look at it! Her dress, hair, shoes and the like are all free hand cut collage from various types of pinkish paper. The star on her belly is a chipboard die cut. I added a bit of embellishment to it with sharpie and white paint pen. The background is just black sharpie zentangle drawing with a hint of the white paint pen here and there.

No drawing, no art at all on the backside of Marie. This is just a pink paper heart doily cut to fit the backside of the envelope and fabric embroidery patch in the shape of an unopened rose bud.

Words Envelope Book Page
There is no rhyme or reason to this page. Just a bunch of pinkish papers glued down randomly in some sense of order I can't fathom. I then embellished it more with words in red sharpie, some peace signs and a bunch of random marks. I like the whole effect of it all though so it worked out alright! I did have my doubts about it as I worked on it. 

This is the backside of the words page. This mandala represents hope.

Owls were on the girl's list of themes she likes so I went with a pink owl in keeping with the pink theme of the envelope book. This one has yet to get something on the backside. It will have a mandala like the others. I'm thinking I should add a mandala on the backside of the Marie page to keep with the theme as well. Not sure I will do that but we'll see. 
There's still quite a ways to go on the envelope book before it is done. Mail date is the 7th of Feb so I better keep on with this one if it's get finished in time! There's still two covers and four more envelopes to decorate, not mentioning that I still need to figure out what the devil I'm going to fill the envelopes with! They'll need little things that will fit in the envelopes; stickers, embellishements, what have you. 
All still in the works!

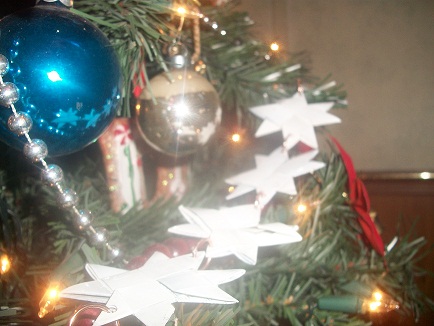
And then there's the paper star garland I forgot to take a picture of when I hung it on the tree the other day. 

I've already shown you all the stars in a previous post. Probably at the end of November or early December. I don't rightly remember just when I did these. They started out as long strips of magazine pages, folded into what was supposed to be a 3-D star. My paper strips weren't quite long enough to make the stars all the way so I stopped at this point and ended up with flat stars. I spray painted the stars white and then they sat in a basket for weeks till it hit me one day that I could make them into a garland. So I punched a hole in either side of the stars (ruined a few with wrong placement of the hole) and hooked them together with hand made copper wire jump rings. I ended up with a garland with, (I think, I didn't really count) 28 or 29 stars.

The garland would be nicer if it were a tad longer. I may make more of these babies to add to this garland for next year's tree.

I really like how they look on the tree!

I suspect when I get more things made, you all will be the first to have a look at them!

Be good to one another! 
Make this your best year yet!
Peace
831

01 January 2012

A New Year, A New Beginning

I haven't really sat down and thought about what I'd like to accomplish in 2012. I know I'll be doing artwork on a regular basis, that's become a habit over the last couple years. It's a given. I would like to write more poetry this year than I did last year. Though I wrote more poetry last year than I did the year before so maybe that's becoming a habit as well. Perhaps this is the year to start a poetry blog? Not sure about that one.

It's the first day of the new year and I have done artwork today. A bit of drawing in the form of a mandala and a bit of collage work in the form a bejeweled cupcake. I started on a new project yesterday. The deadline is to mail the first week in Feb. Time's a flying! I'm almost to the halfway mark on the inside pages of the envelope book. Still have five envelopes to pretty up and then make a cover for the book and fill it with goodies. It's a bigger project than I anticipated when I agreed to this trade. It's a good challenge though! I'm well on my way to completing it with no trouble at all. The hard part will be deciding how to bind it.
I think I am going to use a bolt system for the binding. First I have to locate appropriate bolts and nuts to see if it can even be done like I'm thinking. Locating nuts and bolts involves going to the garage and raiding the bucket with nuts and bolts in it.

I don't have any pictures to show you today. I need to clean off this desk (yes, it's still a mess from the last time I said it needed cleaned off.) so I can clean off the top of the scanner and put all that stuff back on the desk where it belongs! Messes have taken over for the first of the year! A major cleaning spree is slated as soon as Christmas gets over with! The cutting room, kitchen table (that's where I do paper mache work), sewing table in the bedroom and this deskroom all need a major going through!

One of the things I am vowing to accomplish in 2012 is to not buy anything for arts and crafts! NOTHING! If folks want to give me things, yeah, I'll gladly accept the gift and eventually put it to good use, but I'm not buying anything! Maybe a bottle of glue or two, but no paper, no beads, no fibers, no embellishments, no paint, markers or the like. I have enough arty supplies to keep me busy for an eternity! Well. at least through a whole year, with extra to share!

I've done not a whole lot today. Other than work on the envelope book for a couple of hours, I've been planted in front of this computer either playing games, trying to sign in to Yahoo (they don't like my password today...) or playing games on facebook. A rather non productive day in all aspects.
I have made three pots of coffee and cooked some rice and beef for supper. I declined two offers for supper this evening. I really don't feel well enough to traipse across the backyard to go to either Ma or Susan's house for ham and beans.. Take your choice, they both made it. There will be leftovers tomorrow I'm certain!

I'm going to try and do a post every day this year. We shall see how long that keeps up! :)
I really don't have any new news so I'll let you get on with your day!
Happy New Year!

Followers